Administration
Once an Installation administrator has setup a ShareAspace installation
and bootstrapped the ShareAspace host with a collection it is possible to access
the collection as a Collection administrator.
In this section we will look at how a Collection administrator can manage
a collection using the ShareAspace Web application. All of the operations
described in this section (and some additional ones) can also be automated
using the ShareAspace REST APIs. The REST API usage is described in the
REST API usage section.
Accessing the Administration pages
After logging on to ShareAspace, a Collection administrator can access the Collection Administration pages via the user menu in the top right corner.

About
The about section lists information about ShareAspace application components and third party components, used by the current installation of ShareAspace.
The about section displays the name, description, and version number for each used component.

Each ShareAspace installation/patch package comes with a file detailing the current versions for each component.
Note
If you are in contact with Eurostep support engineers you might be asked to provide this information.
Alerts
From the alerts section a collection administrator can set a collection wide alert that will show up in an orange toast on the collection as well as on all spaces within the collection.
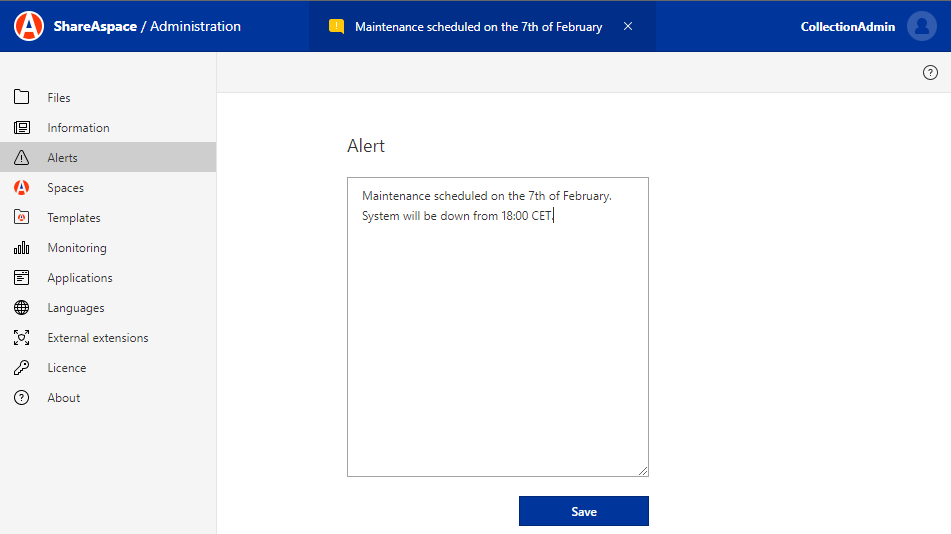
To add an alert, type the alert text in the Alert editor and hit save.
The news will be visible to all users invited to the Collection, independent of which Spaces they have access to.
The alert toast can be closed by a user.
Example of an active alert:

Click on "Read more" and you will get a dialog box showing the full text of the alert.

Languages
The Languages section allows a collection administrator to change or add languages at any time after the bootstrap of a collection. These are the languages that are available for use by the ShareAspace User Interface (UI).
After the installation, the languages configured at the collection bootstrap time (i.e. in the bootstrap_collection.json file) will be displayed here.
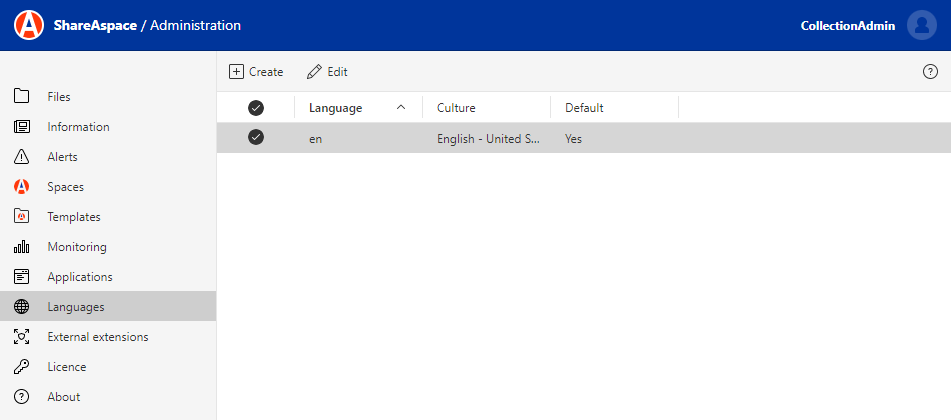
To add a new language, click the "Create" button, set the key, set the Culture and hit the "Save changes" button.
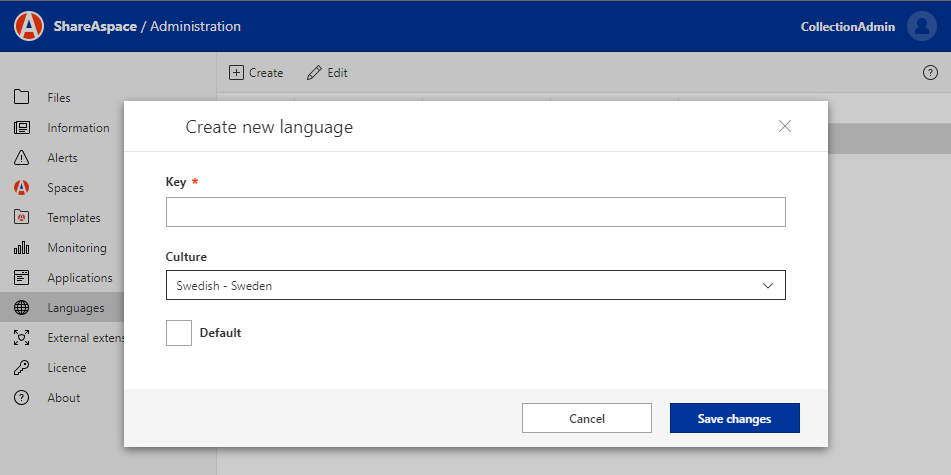
The new language will then be available from the web UI providing that a translation file has been setup for the language and that the language's key is used in the space configuration.
See section Language: Step-by-step
Note
A language could be used to provide domain specific terminology as well as, say, French and English.
Licence
The licence section allows a Collection Administrator to request and manage the licence for the installation.
Read more about the concepts behind the licence in the concepts documentation here.
Acquire licence
For a newly setup ShareAspace installation it could be so that the licence was setup during the Collection bootstrap. Read more about this in the Installation section.
If the licence is not already setup the only accessible sections in the Collection Administration are the Licence and About sections.
Entering the Licence section when there is no licence installed, the following screen (or a variant of this in case a licence request process has already been started) will be shown.
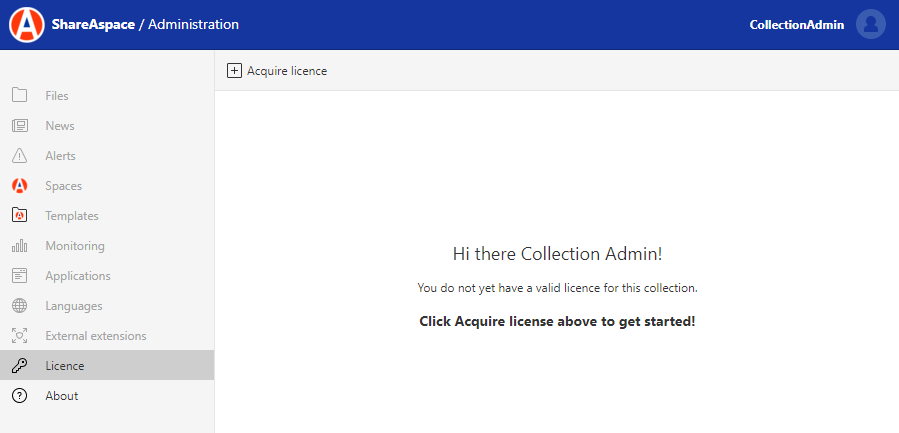
To start the licence acquiring process, click the Acquire licence button in the top ribbon menu.
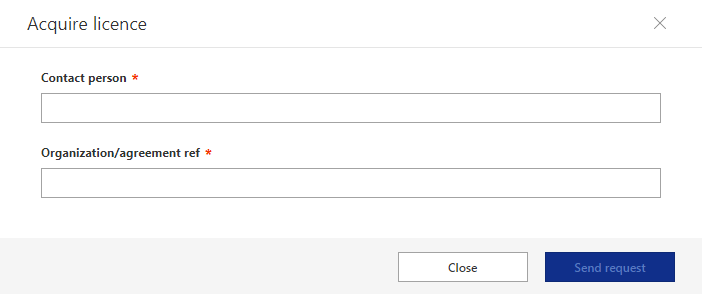
This will bring up a form to fill in for sending a license request to Eurostep:
| Property | Description |
|---|---|
| Contact person | The email of the contact person for the licence. |
| Organization/agreement ref | The licence agreement reference that was given when purchasing the ShareAspace licence. |
After filling out the details in the form and clicking the Send request button, a file download will start, providing an OLR.json (Offline Licence Request) file.
Email this file to productsupport@eurostep.com. An accurate licence agreement reference will be enough for Eurostep to issue a licence according to the signed licence agreement.
Example of the contents of the OLR file:
{
  "id": "09ba345cf123401a826adb123558efe5",
  "requestor": "john.doe@eurostep.com",
  "customer": {
    "companyName": "",
    "contactEmail": "john.doe@eurostep.com",
    "agreementId": "My ShareAspace Licence Agreement"
  },
  "novaBaseUri": "https://XYZ.eurostep.com/api",
  "collection": {
    "clusterNodes": 1,
    "startDate": "2019-09-09T10:50:01.623Z",
    "endDate": null,
    "capabilities": null
  }
}
The licence will be signed and issued for the specific installation.
Import licence
After retrieving the license file from the Eurostep licence administrator it is time to install it. Once the OLR process is started a new button will appear in the ribbon.
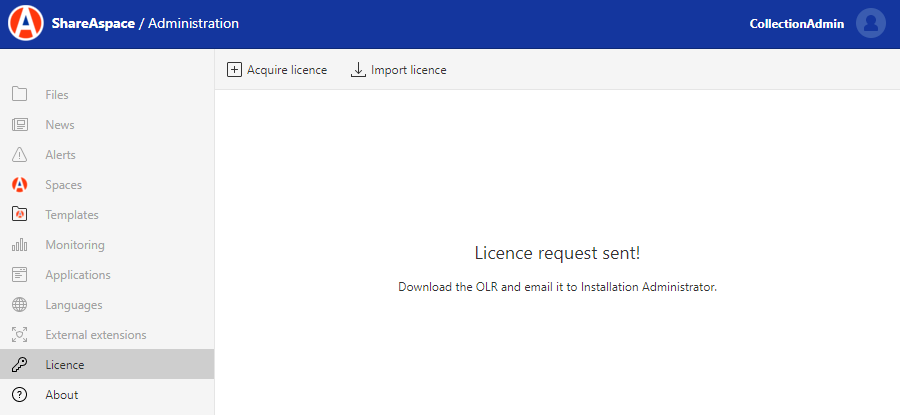
To upload a signed licence, click the Import licence button.
A file picker dialog will appear, select the licence file provided (.olrp, offline licence response file).
Once a valid and licence is uploaded the licence view will change to show the details of the licence.
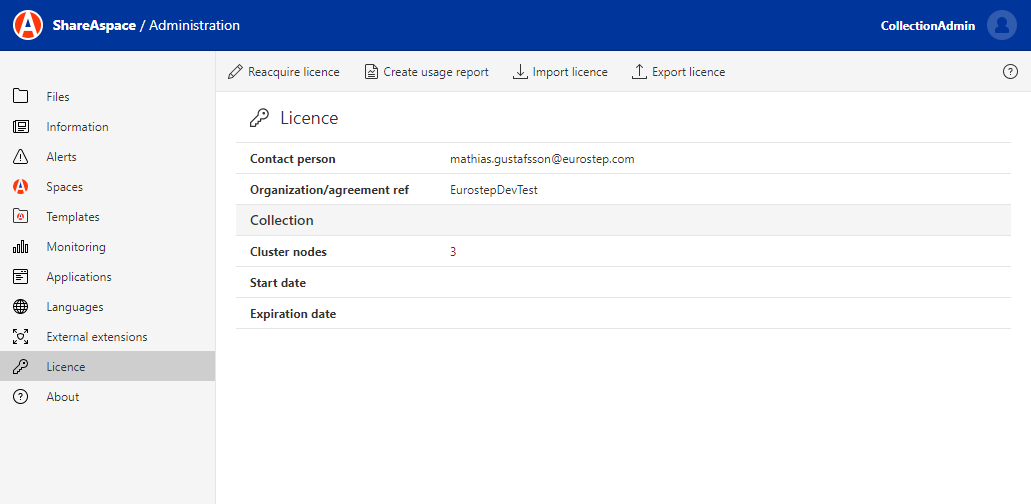
A new set of buttons will also be activated in the ribbon menu. See documentation below for details.
Reacquire licence
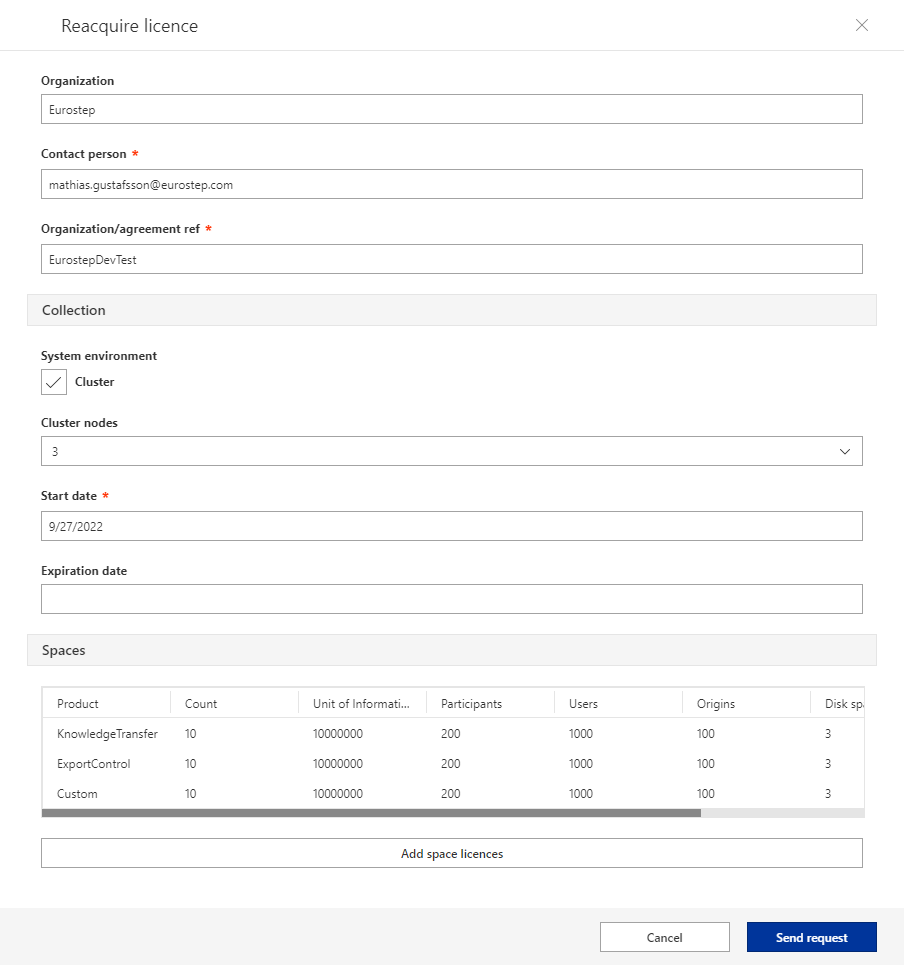
If a licence has expired or an extension of an existing license is needed, click the Re-Acquire licence button in the ribbon. Doing this will bring up a form with the full details of the current licence.
If a new licence has been negotiated via the licence agreement, the agreement reference is enough. However the details for requesting a new license before an agreement can be specified and sent via the following form.
The licence specifies the usage on a collection level together with a set of allowed Space configurations.
| Property | Description |
|---|---|
| Organization | Name of the organization acquiring the licence. |
| Contact Person | The email of the contact person for the licence. |
| Organization/agreement ref | The licence agreement reference that was given when purchasing the ShareAspace licence. |
| Collection | |
| System environment | Select whether or not you want a licence for a clustered host node setup. |
| Cluster nodes | If System environment is set to Cluster, specify the number of nodes in the cluster. |
| Start date | The start date for the licence. |
| Expiration date | The end date of the licence. Can be left empty for perpetual licenses. |
Add/Edit/Delete Space
A Space can be added by clicking the Add space instances button.
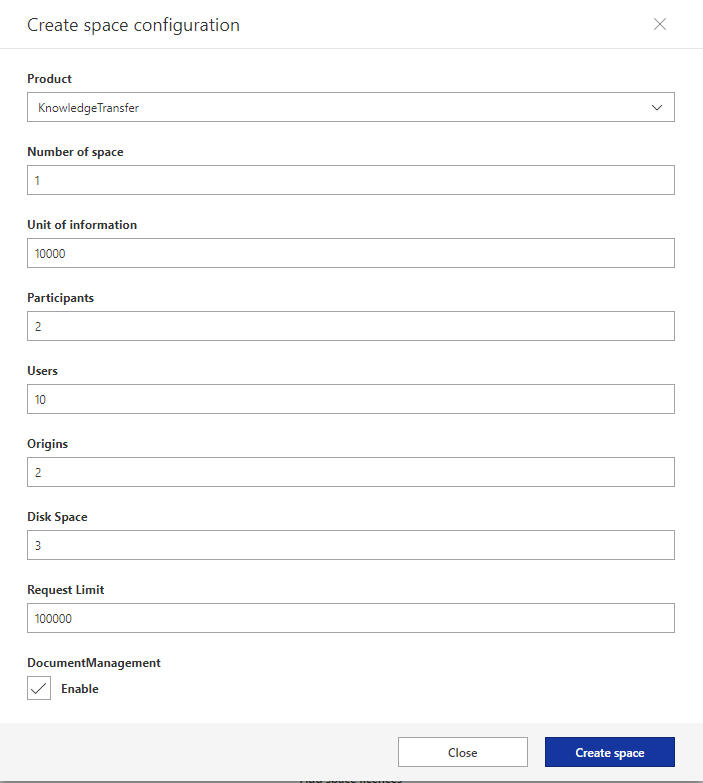
To delete or edit an existing space. Click the menu button for the space to edit/delete.

When deleting a space there will be a confirm window where the space id must be typed before the delete operation takes action.
Warning
Once a space is deleted the operation cannot be reverted. The only way to restore a space would be via a backup restore.
| Property | Description |
|---|---|
| Product | Either a product packaged and sold with ShareAspace, or Custom for a complete custom configuration of ShareAspace. |
| Number of spaces | The number of instances of the Space configuration it is possible to instantiate on the Collection. |
| Unit of Information | The number of Unit of Information allowed per Space of this type. |
| Participants | The number of Participants allowed per Space of this type. |
| Users | The number of registered users per Space of this type. |
| Origins | The number of Origins per Space of this type. |
| Disk Space | The allowed disk usage in GB allowed for per Space of this type. 0 = as much as available on the hosting environment. |
| Request Limit | Currently not activated. Will in the future be a way to manage the API requests limit. |
| Features | Product features to be enabled, like "Document Management". Available features can vary depending on product packaging. |
Create usage report
Once Spaces are being instantiated on the ShareAspace Collection, the licence administration UI will show each instantiated Space. For each space it will also show the current resource usage in relation to the licence definition.
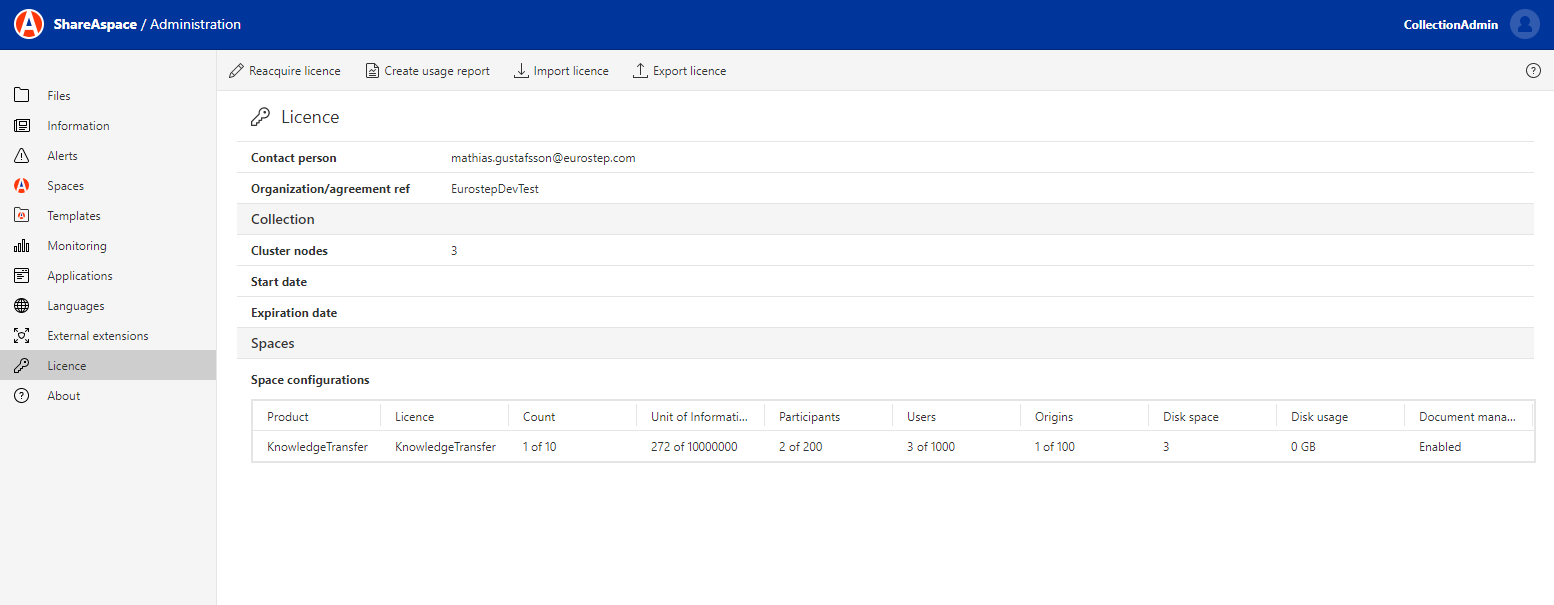
It is also possible to download a licence usage report (in a JSON format). This is done by clicking the Create usage report button in the top ribbon menu. Clicking the button will start a file download of a file UsageReport.json.
Example UsageReport.json
{
  "collection": {
    "clusterNodes": 3,
    "startDate": null,
    "endDate": null,
    "capabilities": null
  },
  "state": "Active",
  "licenseVersion": null,
  "customer": {
    "companyName": "Eurostep",
    "contactEmail": "john.doe@eurostep.com",
    "agreementId": "My ShareAspace Licence Agreement"
  },
  "issuer": {
    "email": "licenseAdmin@eurostep.com",
    "date": "2019-09-10T11:12:23Z"
  },
  "novaBaseUri": "https://XYZ.eurostep.com/api",
  "spaces": [
    {
      "id": "documentation",
      "name": "Documentation",
      "product": "KnowledgeTransfer",
      "metrics": {
        "dataLevels": {
          "unitOfInformation": {
            "count": 254,
            "max": 10000000,
            "exceeded": false
          },
          "participant": {
            "count": 2,
            "max": 200,
            "exceeded": false
          },
          "origin": {
            "count": 1,
            "max": 100,
            "exceeded": false
          },
          "user": {
            "count": 3,
            "max": 1000,
            "exceeded": false
          }
        },
        "capabilities": [
          "DocumentManagement"
        ],
        "serverPolicy": {
          "diskSpace": 3,
          "requestLimit": 10
        },
        "product": "KnowledgeTransfer",
        "id": "KnowledgeTransfer",
        "diskUsage": 0
      }
    }
  ],
  "spaceSlots": [
    {
      "id": "KnowledgeTransfer",
      "product": "KnowledgeTransfer",
      "count": 1,
      "max": 10
    }
  ]
}
Export licence
If you want to export the licence file from ShareAspace you just click the Export licence button in the ribbon menu. This will start a file download for a file named license.olrp.
This is the signed licence that can be used to apply a licence to the same server (typically after re-installation on the same server).
Monitoring
From the Monitoring section a Collection Administrator can see the current status of the host(s) configured for the ShareAspace Collection.
The Collection Administrator can also see how much information is stored on the Collection Level as well as in the different Spaces on the Collection.
Single mode
If the ShareAspace installation is running with only one ShareAspace Host
Node the top of the monitoring page will state The server is running in single node mode.
Statistics
The statistics are divided into different sections. One for the Collection and one section for each Space hosted on the Collection.
It is possible to see
- How many
Unit of Informationare instantiated, grouped per base type - How many entries each configured index contains
- How many instances of configured SoftTypes are stored
Collection and two Spaces
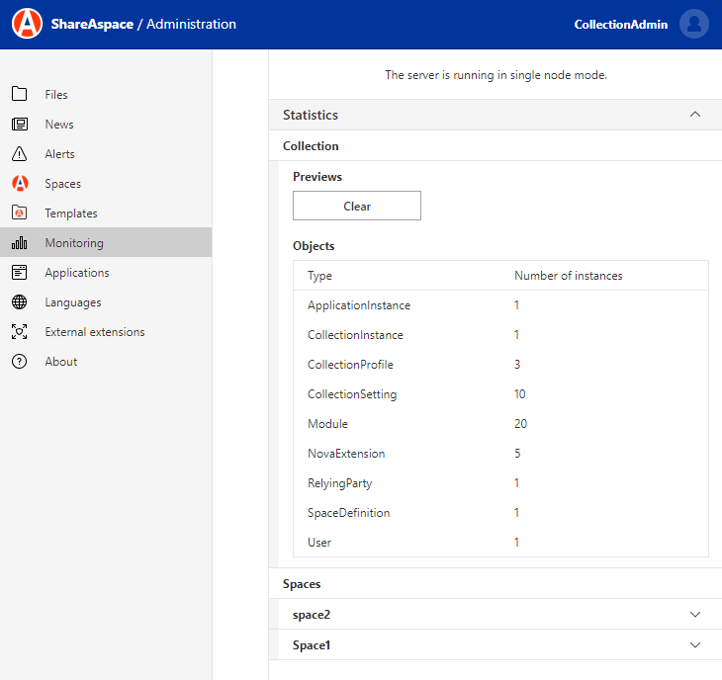
It is also possible to clear the File Preview cache for the files stored in the collection file vault (not space specific) by clicking on the Clear button.
Space section expanded
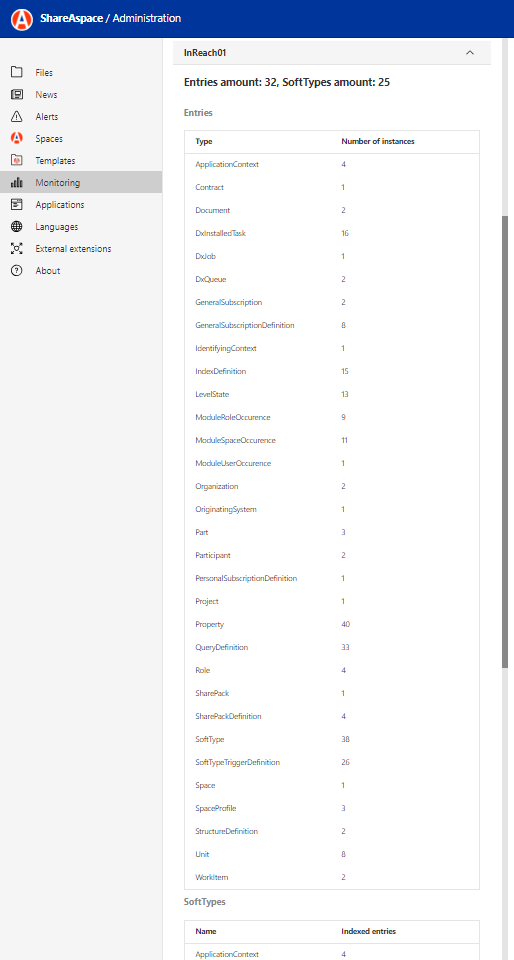
Information
From the information section a collection administrator can set the global information for the collection. The information text is written using the markdown notation. The markdown icons will only show when you hit the markdown icon boxed in red below. The news will be displayed on the collection homepage on the right hand side of the list of Spaces.
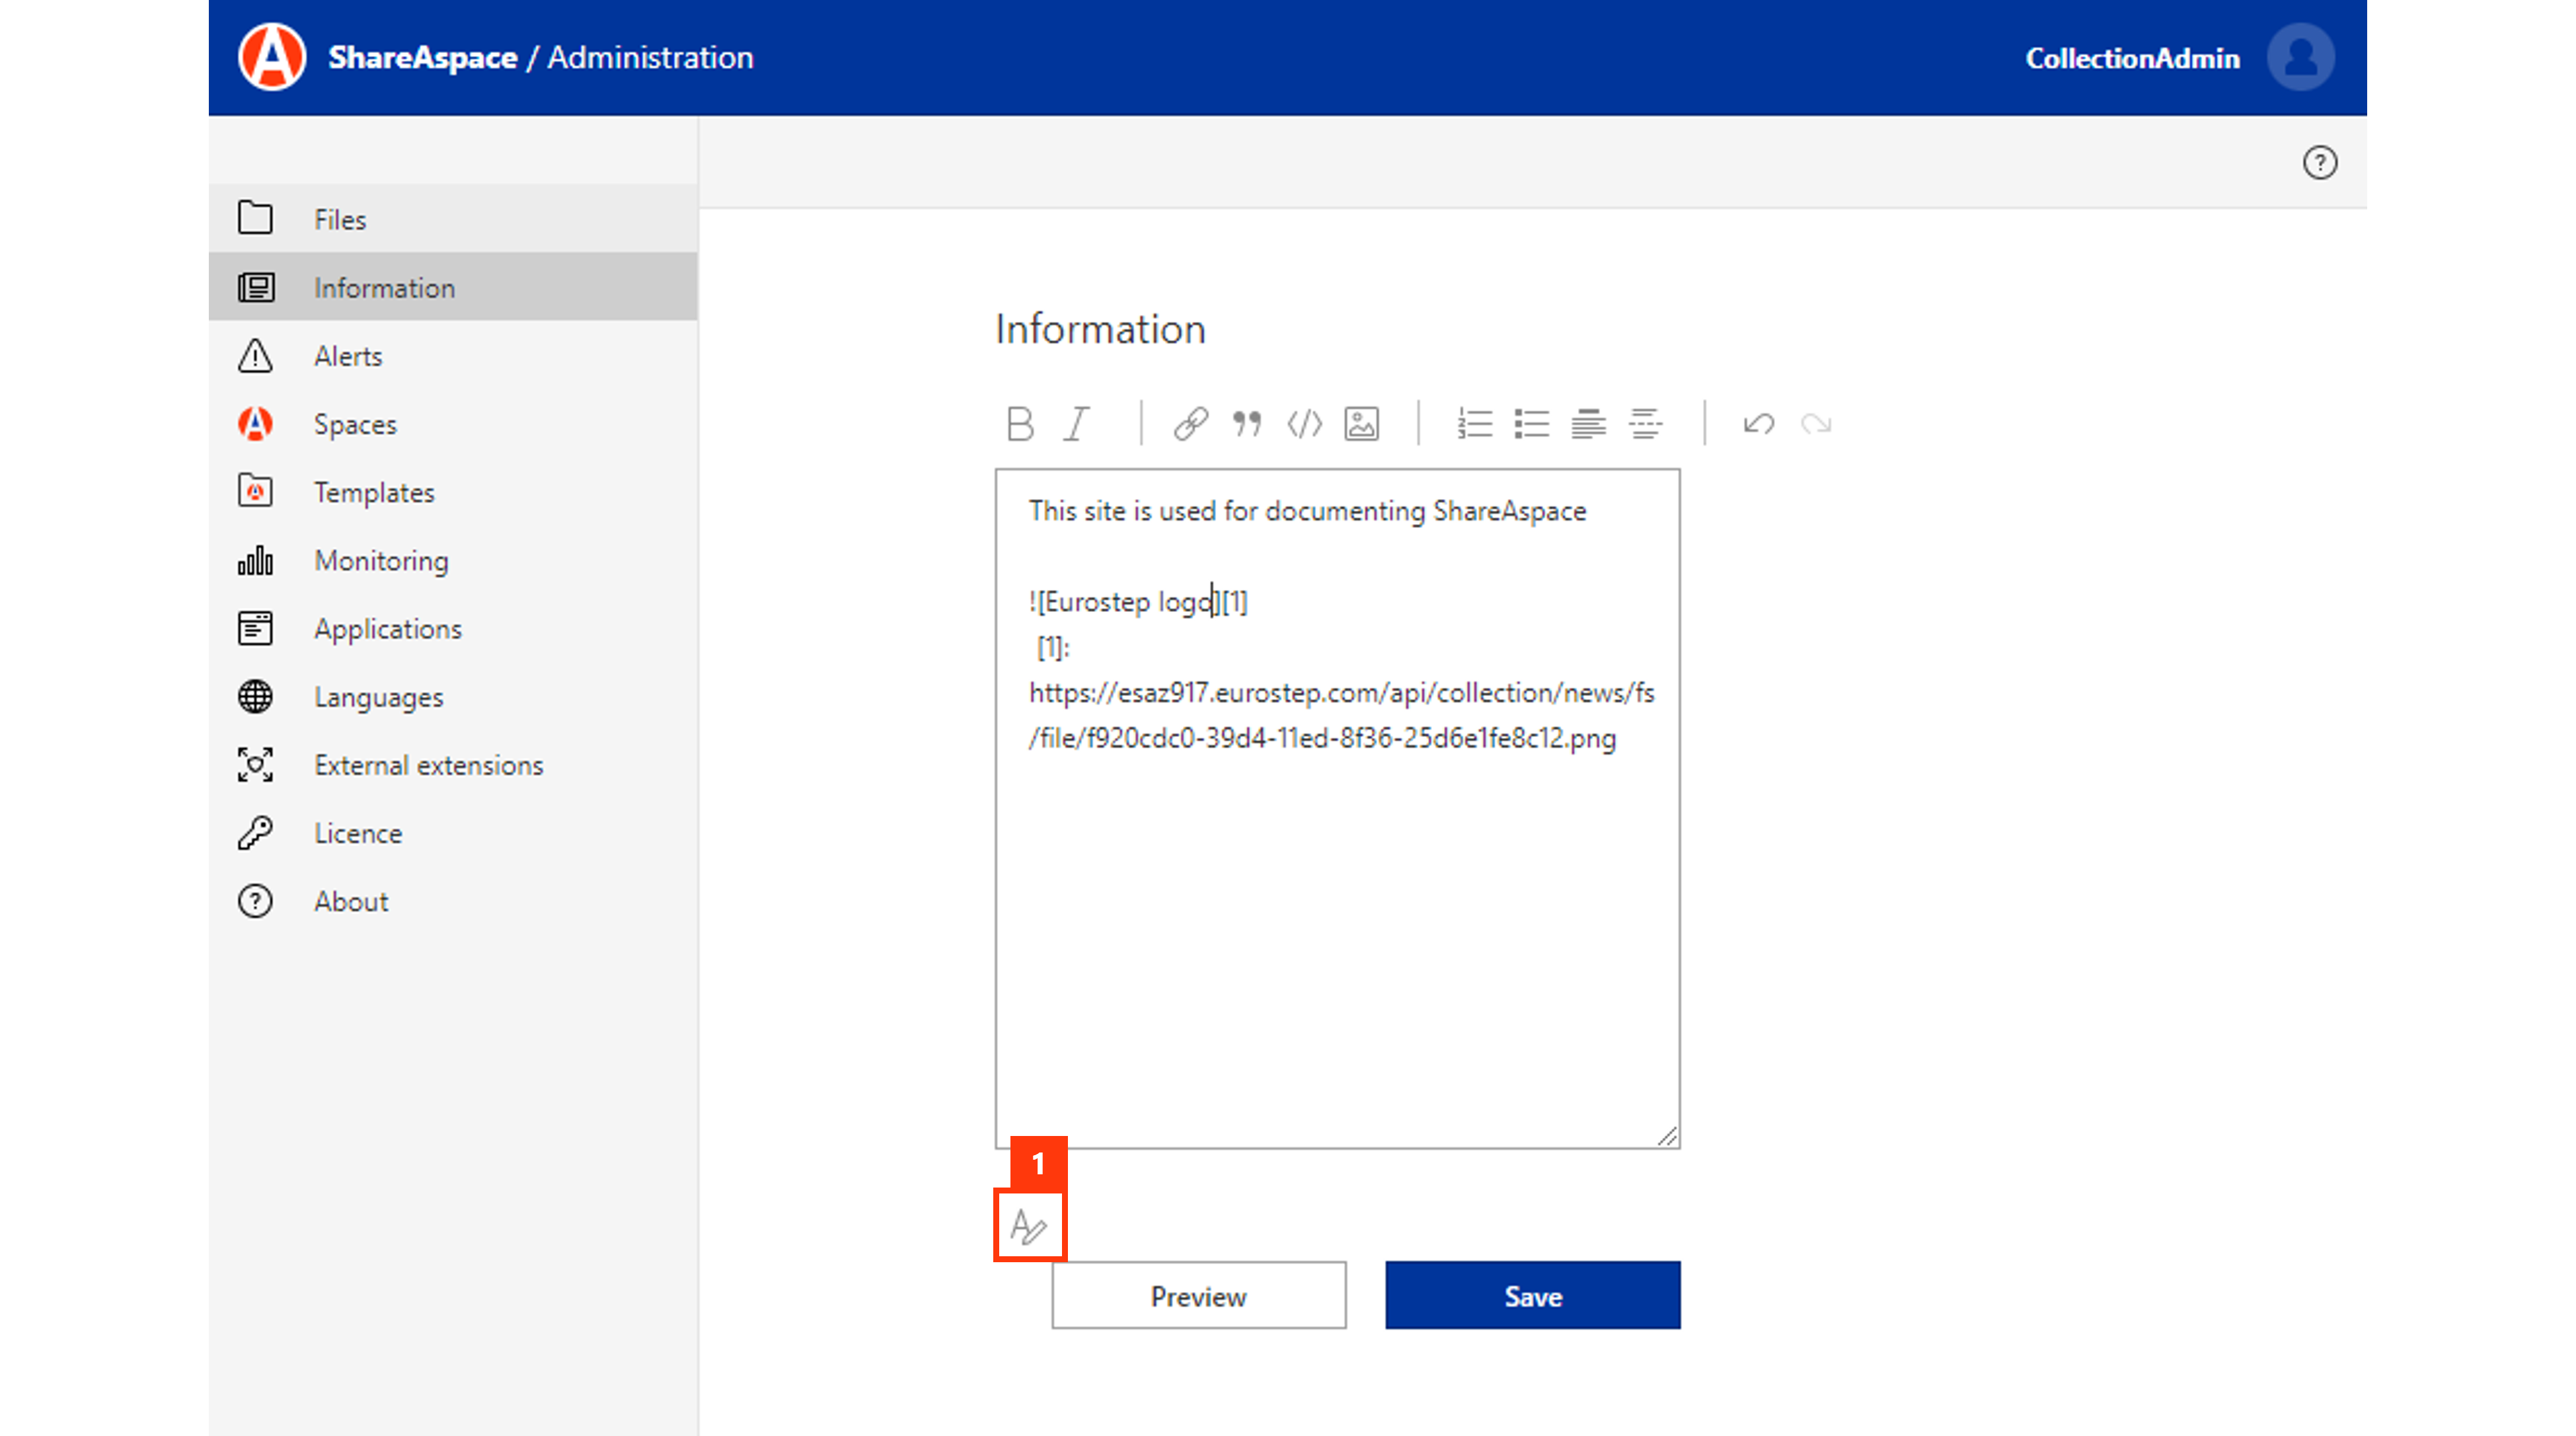
To add information, type the information in the Information editor and hit save.
The information will be visible to all users invited to the Collection, independent of which spaces they have access to.
Service accounts
From the service accounts section a Collection Administrator can see and manage all service accounts on the collection.
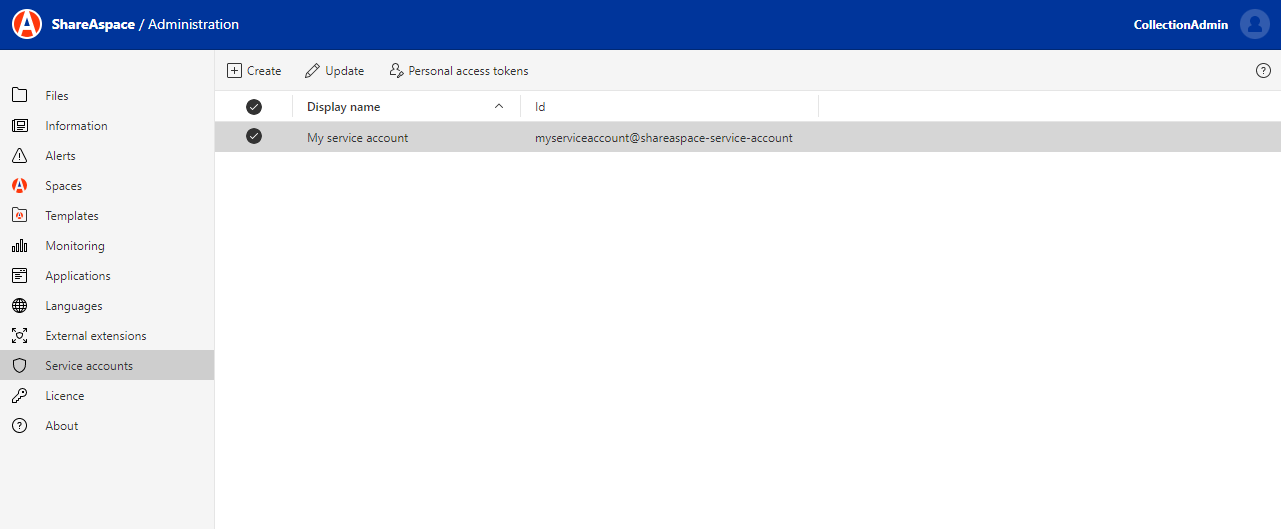
Create service account
To register a new service account, click Create.
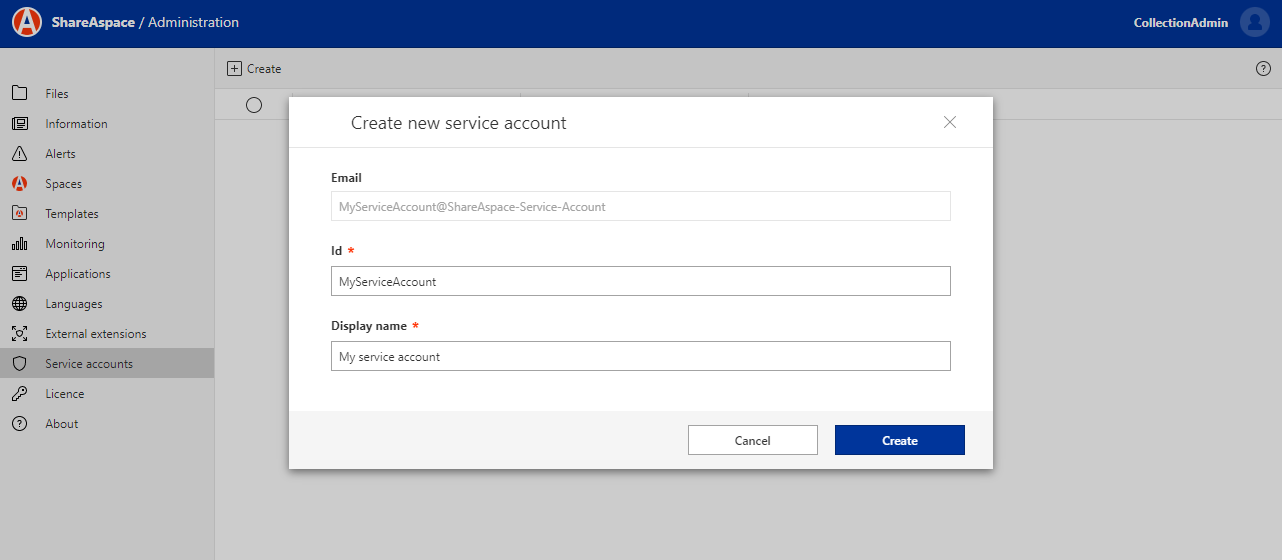
Provide a unique id and a display name. Note that the "full unique id" will be {UNIQUE_ID}@shareaspace-service-account where {UNIQUE_ID} is replaced by the provided unique id, e.g. myserviceaccount@shareaspace-service-account.
Update service account
To update the display name of an existing service account, select the service account from the list and click Update.
Manage personal access tokens (PAT)
To manage the personal access tokens for a service account, select the service account from the list and click Personal access token.
Please refer to the Manage personal access token user guide.
Spaces
From the Spaces section a Collection Administrator can see all spaces hosted within a collection. From here it is also possible to start new spaces.
List of spaces

Create a new space
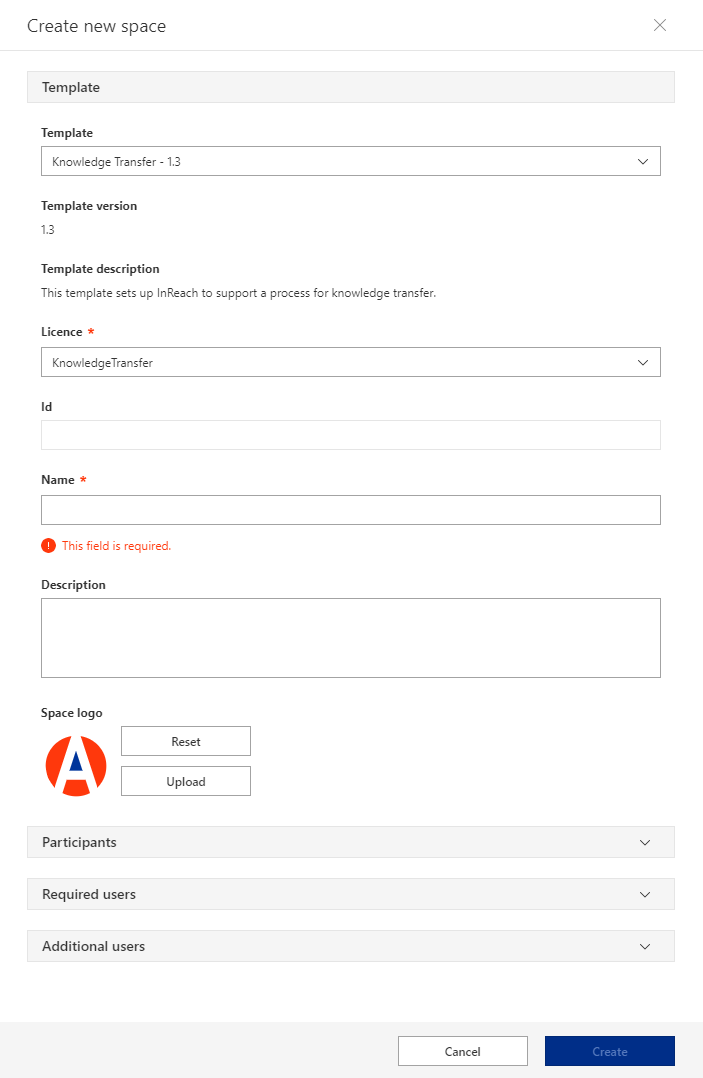
To create a new Space, click Create.
- First select a template for the Space.
- Select a valid licence to use. Note that the licence must have an available slot for you to be able to create the Space.
- Give the Space a name, only use A-Z and 0-9 characters.
- Note that the Space Id is automatically set, replacing spaces with
-. The Space Id will be part of the Web application and REST API routes
- Note that the Space Id is automatically set, replacing spaces with
- Give the Space a description.
- Set a logotype to be used by the space. If nothing is provided the ShareAspace logo will be used as default.
- Fill in the template dependent input parameters such as Participant id, Participant name, and invite users to required roles as defined in the template.
Runtime update
It is possible to update the Configuration of a Space during runtime. When updating the configuration all configured indexes will be updated.
The following cannot be changed during a runtime update:
- It is not possible add or change SoftType instances (i.e. identified instances according to a SoftType. SoftType configurations can however be updated)
- Example: It is not possible to add Participant instances with a Runtime Update
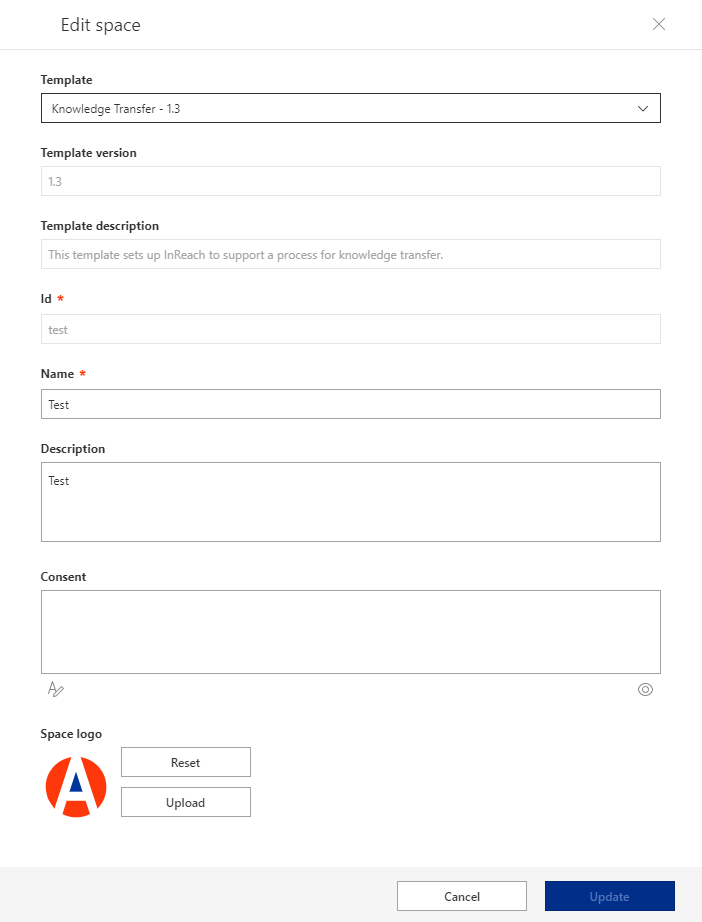
To update a space configuration:
- Upload the new Space Template (make sure it has a unique id)
- Select the Space to be upgraded from the list under
Spaces - Click the
Editbutton - Select the new template to be used by selecting the template from the dropdown
- Click
Update
Warning
Be aware that a Space Template that has changes to anything but Web Module configurations will trigger a rebuild of all Indexes. Depending on the size of the indexes the time taken can vary. Extensive indexes can take hours to update. It is still possible to read and create data during index updates. However, query results will not be reliable until the indexes are up to date.
Note
That a space update will never update SoftType instances even if the instances in the template have been updated. This includes but is not limited to SoftType instances of Participants, Roles, Triggers, Subscription definitions, Subscriptions, and any other SoftType instances that might have been defined.
Delete a Space
It is possible to delete a Space from a Collection.
To delete a space:
- Select the Space to be deleted from the list under
Spaces - Click the
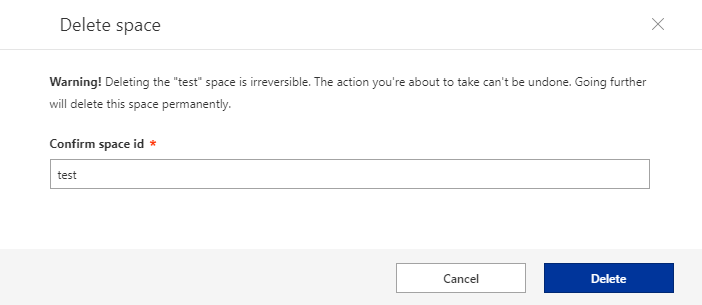
Deletebutton - A new dialog will be prompted asking to confirm the action to delete the space
- Enter the space ID to confirm the action
- Click the
Deletebutton
Warning
Be aware that when deleting a space the action is irreversible and cannot be undone. All data in the space will be removed permanently.
Clear file previews
When a collection and space is configured to use File Preview, any files uploaded to a space can be previewed without downloading the file. The previews are images of the first 100 pages of the files which are cached on the first preview request.
It is possible to clear this cache for all previewed files in the space. To clear the file preview cache:
- Select the Space from the list under
Spacesto clear the file preview cache for - Click the
Clear previewbutton
Rebuild full-text-index
If full text indexer extensions are registered and used by a Space it is possible to trigger the full re-indexation of that full-text-index.
To rebuild index:
- Select the Space for which the indexes are to be rebuilt from the list under
Spaces. - Click the "Reindex full-text-index".
- Depending on the size of the indexes the time taken can vary. Extensive indexes can take hours to update.
- Refresh the
Spaceslist to see the rebuild progress.
Rebuild SoftType index
Upon data creation (and depending on Index definitions for a space), indexes are being populated at runtime. In some situations, there might be a need to rebuild the data indexes in a space.
To rebuild indexes:
- Select the Space for which the indexes are to be rebuilt from the list under
Spaces - Click the "Rebuild SoftType index" button
- Select a specific index or the option of rebuilding all indexes.
- Depending on the size of the indexes the time taken can vary. Extensive indexes can take hours to update.
- Refresh the
Spaceslist to see the rebuild progress.
Licence
Provided that there are free space slots on the licence for the type of the selected space it is possible to change the licence of an active space.
This is done by clicking the Licence button in the ribbon menu. A window will appear that allows you to select a new licence.
Reconvert cad files
If a 3D viewer extension is registered on the installation it is possible to trigger a full clear and rebuild of the 3D viewer cache for the selected space. This is done by selecting a space and clicking the Reconvert cad files button in the ribbon menu. Note that re-converting the CAD files is a long running process. The time required for a reconvert is directly depending on the amount of CAD files that are stored in the space.
Space status
| Status | Description |
|---|---|
NoLicense |
There is no license for the space. |
Active |
The space is active and can be used. |
InvalidLicense |
The license for the space is invalid. |
GracePeriod |
The space has exceeded the current license and has entered the grace period. Once the grace period is over (and no action has been taken) the space status is changed to InvalidLicense. |
CreateInProgress |
The space is being created and is not accessible. If the creation is successful the space status will change to Active. If the space creation fails the space status will change to CreateFailed. |
UpdateInProgress |
The space is being updated and is not accessible. If the update is successful the space status will change to Active. If the space update fails the space status will change to UpdateFailed. |
CreateFailed |
The space creation has failed. |
UpdateFailed |
The space update has failed. |
Templates
From the templates section a Collection administrator can view the application configuration templates that are installed on the Collection. From here it is also possible to download installed configurations as well as uploading new or modified configurations.
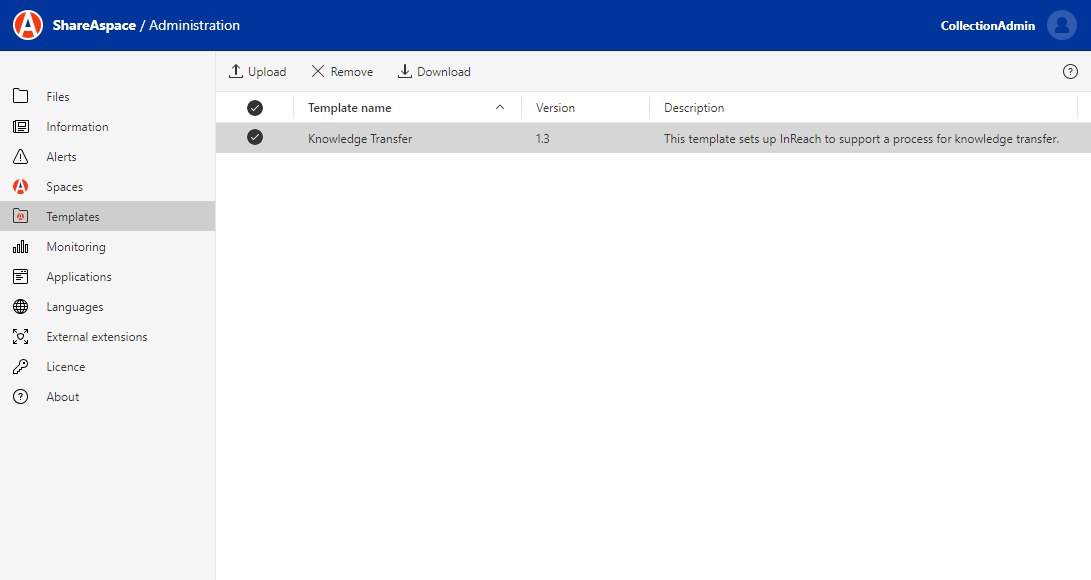
To upload a template, click Upload and select a configuration file to upload.
It is important that the configuration template matches the version of ShareAspace installed.
To download a template from the server, select the template from the list
and click Download.
To remove a template from the server, select the template from the list and click Remove.