User interface
The Maturity System Module is used for managing the States of PLM objects.
The module will allow you (depending on your access) to either promote/demote objects to/from the next state in a maturity system or to send a promotion/demotion to someone that has access.
Layout
The layout is very similar to the authoring module described in the Space user guide. However, the object view and ribbon menu differs quite a lot.

Object View
Select Maturity System
In the object view you can see the rule fulfilment for an object in its current state as well as for the next available step(s).

One object can have multiple Maturity Systems defined, therefore you have the option at the top to select what maturity system you want to see the status for.
States
The next section shows the current state as well as the possible following states (there can be more than one, depending on configuration).
A green tick icon after the Current State means that the rules defined for the current
state are fulfilled. A red x icon means that the state rules are not
fulfilled.
A green tick icon after a Next State means that all the rules are
fulfilled and that you have the access to move the object into the
next state.
A red x icon means that the state rules are not fulfilled and/or that you do not have the access to move the object to the next state.

A magnifying glass icon means that there are external validation rules configured. These must be run in order to know if you can move the object in to the next state (more on this later).

To get an idea of why an object can or cannot be moved in to a following state one must look at the details further down in the Object View.
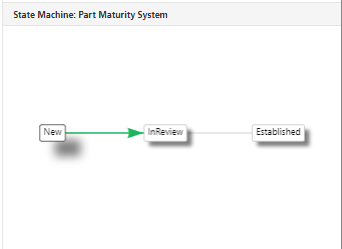
State machine
The State Machine section shows the whole configured maturity system in a graphical representation. The current state will be highlighted and the default next step will be shown as a red or green arrow. Red means that you cannot move it into this state and a green arrow means that you can move it.

Approver
The approver section will show what role is required to move the object
into the next state. An icon after the Approve promote will signal whether
you has this role or not.

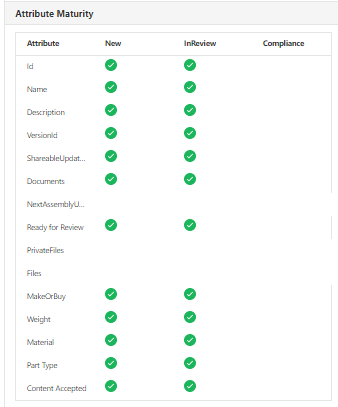
Attribute maturity
The attribute maturity section will present the rule configuration and the current objects fulfillment of these rules on a detailed level. Each port within the SoftType can have its own rules. Green tick icon means that the rule is fulfilled (or that there is no rule). A red x icon marks that there is a rule that is not being fulfilled.

External validation
If an external validation is configured for the current state, the external validation section will show up. The external validation will use an external service to do an advanced validation of the current object. The external validation could for example evaluate other referenced objects and their statuses.

It is possible to run the external validation on demand by clicking the blue play button. The result of the validation will be presented in this section once the validation is complete.

State history
The state history presents a history log of what states the object has had over time. The history log presents the point in time for when the object entered the state as well as what user took the object to that specific state.

Promote
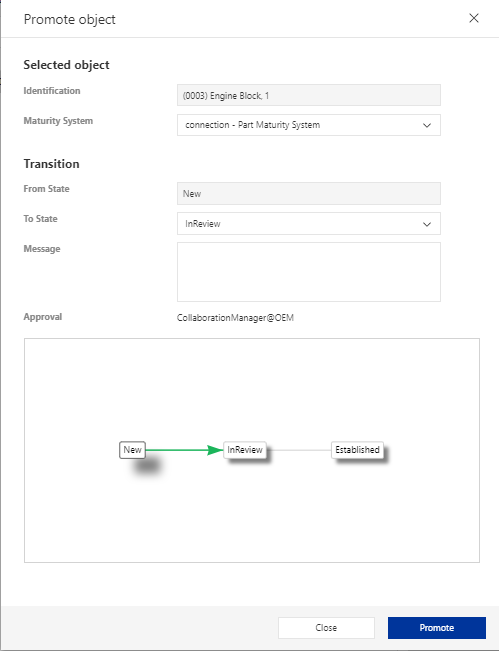
To promote an object object, select the object from the query result list
and click the Promote button in the ribbon menu.
If the maturity system has an external validation configured this validation will be run automatically when you open the form.

If the object has more than one maturity system configured, select the
system for which you want to perform the move by selecting it from the
Maturity System drop down list.
Under Transition / To State pick the state to which you want to promote
the object.
Optionally type in a history log message for the transition in the Message
text area.
Demote
Works like the Promote but in the reverse order.
Note
If the current state has the state of Frozen you will not be able to
Demote the state.
Request approval
If you do not have access to promote or demote an object there will
be a button in the ribbon menu Request Approval. Clicking this button
and filling out the form will create a Work Item (of a configured type,
depending on your Space configuration) assigned to a user that has the
appropriate access to perform the state move.
Pass objects
The Maturity Module is one of the Modules that can be configured to
start with an input object. Typically having an object selected in
another module the Open In ribbon sub menu button will have the
Maturity module as an option. Clicking this button will open up the
Maturity Module and setting the object from the other module as selected
within the Maturity Module.